I’ve been playing around for a while in the new Configuration Manager 2012 console and I’ve decided to write up on the cool things you can do in the new “Monitoring” tab. Basically this is where Microsoft have grouped up all the reports, alerts and status messages to try and make it easier to manage your environment. This is your one stop shop to see what’s happening with your clients.
We’ll be going through using queries to bring up quick detailed information about your environments to using reports to even creating your own custom SSRS reports so selected personnel can review these reports without access to the SCCM console.
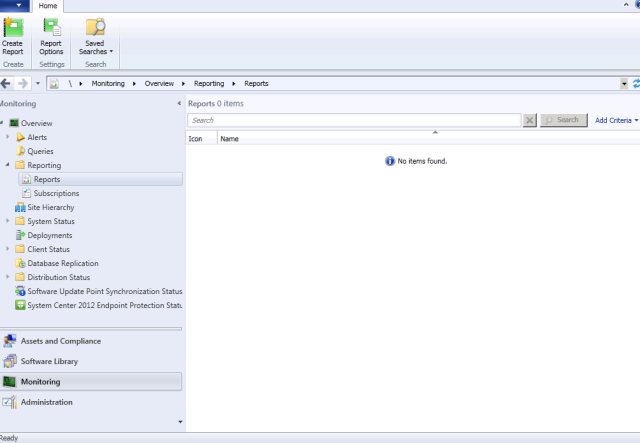
We’ll first go into the Monitoring tab and expand the reporting node, then click on the Reports.
You’ll notice that there are no reports when selecting Reports. This is because you’ll need to add in your reporting service point.

We’ll quickly run through adding this so you can get your reporting up and running with all those lovely predefined reports you can play with.
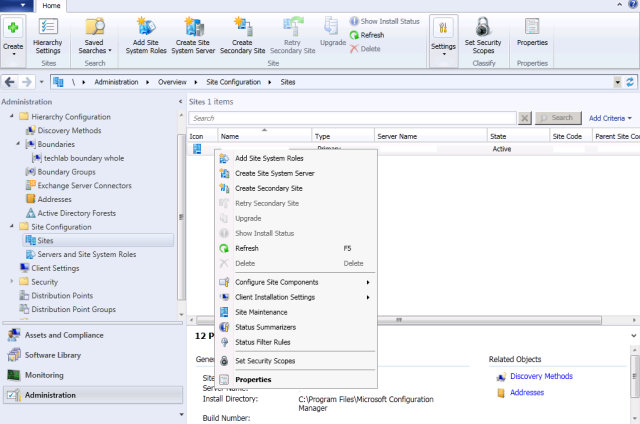
We’ll need to go to the Administration node toadd this reporting service point because it is a site system role. Under Administration, expand the site configuration node and click on sites. This should bring up a list of your primary sites. You should then right click the primary site you wish to add the reporting role to and then click add site system roles.

The site system roles wizard should appear, select whether or not you need to specify any of the first settings such as an FQDN for internet use or a different site system installation account if you’ve created one for this and click next. Now select the reporting point from the list on the specify roles for this server and click next.
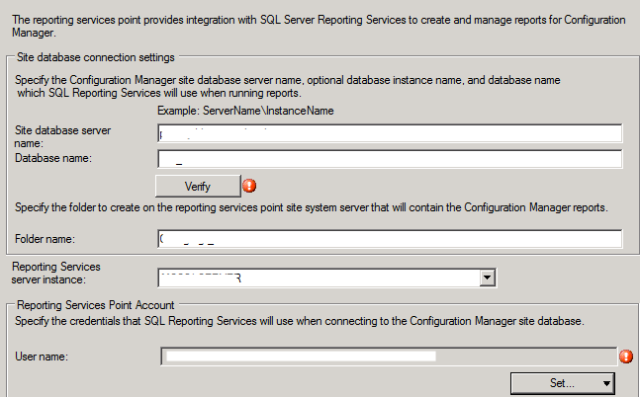
You’ll now need to fill in the details of the site server this role will be added to. It should be autofilled and you can click verify toconfirm this. Once checked, click next.

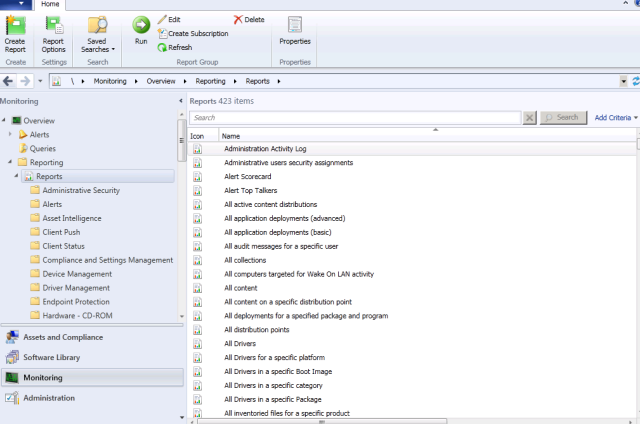
You should now be on the summary screen where you can confirm your settings do so and click next and the reporting point should be installed! Click close to finish. Close the console, and reopen it, now when you go to your reporting point, you should now notice that you have reports!

In the next post, I’ll talk about using the queries for you to get a feel of pull the vast amount of data in SCCM for your use. This will be useful for the later posts when we get on to the more complex parts of the reports. Watch this space
We’ll be going through using queries to bring up quick detailed information about your environments to using reports to even creating your own custom SSRS reports so selected personnel can review these reports without access to the SCCM console.
We’ll first go into the Monitoring tab and expand the reporting node, then click on the Reports.
You’ll notice that there are no reports when selecting Reports. This is because you’ll need to add in your reporting service point.

We’ll quickly run through adding this so you can get your reporting up and running with all those lovely predefined reports you can play with.
We’ll need to go to the Administration node to

The site system roles wizard should appear, select whether or not you need to specify any of the first settings such as an FQDN for internet use or a different site system installation account if you’ve created one for this and click next. Now select the reporting point from the list on the specify roles for this server and click next.
You’ll now need to fill in the details of the site server this role will be added to. It should be autofilled and you can click verify to

You should now be on the summary screen where you can confirm your settings do so and click next and the reporting point should be installed! Click close to finish. Close the console, and reopen it, now when you go to your reporting point, you should now notice that you have reports!

In the next post, I’ll talk about using the queries for you to get a feel of pull the vast amount of data in SCCM for your use. This will be useful for the later posts when we get on to the more complex parts of the reports. Watch this space
No comments:
Post a Comment