This is a quick and easy way to verify if a remote computer is running a 32-bit OS or a 64-bit OS.
If you have trouble getting it to work, be sure you're using an admin command prompt (I've seen wmic not work from a regular command prompt)
1. Open notepad.
2. Copy and paste below and save as OSscript.bat or whatever you want. Enjoy
:Start
cls
@echo off
Echo.
Echo Remote OS Info (Verifying 32-bit or 64-bit)
Echo.
Set /P Computer=Enter the Computer Name:
If "%Computer%"== "" goto BadName
pause
wmic /node:"%Computer%" os get osarchitecture
pause
Goto End
:BadName
Cls
Echo.
Echo You have entered an incorrect name or left this field blank
Echo Please enter a valid Name or press Ctr-C to exit.
Echo.
Pause
Goto Start
:End
Credit
http://community.spiceworks.com/scripts/show/2169-remote-os-info-verifying-32-bit-or-64-bit
Tuesday, October 7, 2014
Wednesday, August 27, 2014
HOWTO to remove SSH Shell warning triangle on WMware ESXi 5
How to remove SSH Shell warning triangle on WMware ESXi 5
After enabling SSH on VMware host version 5, yellow triangle with exclamation point will be added next to the host name. "Alarms" tab will not display anything related to this. In order to disable this warning, select host and go to "Configuration | Software | Advance Settings | UserVars.SuppressShellWarning" and change value from 0 to 1.


Friday, July 18, 2014
Microsoft VSS writer troubleshoot - retryable
Problem: Symantec backup exec 2012 run a backup job and failed with vss writer error message. Login Exchange server => Open CMD => vssadmin list writers => saw Microsoft Exchange VSS writer in retryable error stage. This need to be "No error" and State: Stable in order for backup jobs tow ork.
When contact Symantec they said to restart the exchange server, yes it will temporarily solve it. BUT IT IS NOT THE ANSWER!!! and if you contact Microsoft they will point finger back and forth.
Solution: With many Google searches below are the possible links to fix your VSS problems without Exchange reboot but here is the solution that solved mines.
1) Make sure you ONLY have 1 exchange job running, another exchange job running will cause the VSS error.
2) Restart the Exchange Replication Service
Here are list of links that may solve your VSS error if the top solution didn't do it for you.
http://kb.macrium.com/KnowledgebaseArticle50010.aspx
http://telnet25.wordpress.com/2013/11/06/microsoft-exchange-vss-writer-is-in-a-failed-retryable-state/
http://careexchange.in/how-to-re-register-vss-volume-shadow-copy-service-in-windows-server-2008-r2/#comment-13369
https://exchangetimes.wordpress.com/tag/microsoft-exchange-replica-writer-showing-retryable-error/
Monday, June 9, 2014
SCCM 2012 SQL Server Backup Recommendations
SQL Server Backup Recommendations for Configuration Manager
In Configuration Manager 2012 SP1 and later, note that you have the ability to recover a site (secondary sites don’t count) using a standard, native SQL Server database backup.
From the following link: http://technet.microsoft.com/en-us/library/gg712697.aspx
“Configuration Manager can recover the site database from the Configuration Manager backup maintenance task or from a site database backup that you perform by using another process. For example, you can restore the site database from a backup that is performed as part of a Microsoft SQL Server maintenance plan.”
Why is this important?
The standard ConfigMgr backup task will simply copy all of the database data and log files to the backup folder location. During the SQL Backup task, you have the ability to specify compression for a database backup.
In a recent test on our Central CAS, a standard ConfigMgr backup task resulted in a SQL backup size of about 542 GB. The backup size using the native SQL backup, with compression was 59 GB in size! That is a huge savings in disk space. Given that a restore really only needs the database, using the native SQL backup task makes sense.
There have been a few questions on how to set this up, and what retention to use.
Here is a guide on setting up the back up task using the built in SQL Server Maintenance wizard.
Open Microsoft SQL Server Management Studio and connect to your ConfigMgr SQL Server instance.

Expand the Management node, right click Maintenance Plan. Choose New Maintenance Plan Wizard.

Click Next >

Change the name of the plan. To the right of schedule, click the Change button

Enable backups for at least every other day. Click OK. Then Next >

Choose the following three options, highlighted above, click Next >, then Next > again.

Since you will not want to use backups for recovery over 5 days old, change this setting to 1 week. Click Next >

Under Database(s) client the drop down

Select the database(s) you wish to backup. Got reportserver installed? Be sure to select those databases as well. Click OK

Change the backup folder location to an alternate folder or drive as applicable. Optionally, select the create a subfolder checkbox for each database. IMPORTANT: choose Set backup compression ‘Compress Backup’ to take advantage of compression. Click Next >

For the Define Maintenance Cleanup Task, you will select the folder that the backups are being written, file extension name, include first level folders and reduce the delete file settings to 1 week. Click Next>, click Next > again.

Click Finish to complete.

You should be rewarded with success. Time for a cold one.
After the next schedule run date/time Double check that the database backup was in fact created. And, it is always a good idea to periodically restore a backup to an alternate location as a way to test that this is a valid backup.

The article above is straight from Steve Thompson
http://stevethompsonmvp.wordpress.com/2013/06/07/sql-server-backup-recommendations-for-configuration-manager/
Tuesday, April 29, 2014
Upgraded Symantec Backup Exec 2010 R3 to 2012 SP4 over the weekend.
Objective:
1. Upgrade a CASO and 5 MMS servers from Backup Exec 2010 R3 to Backup Exec 2012 SP4
2. Make sure all the backup jobs are working and the old jobs are restorable.
3. Record the process for future references.
http://www.symantec.com/connect/videos/upgrading-be-2010-r3-be-2012
Result:
I was able to successfully upgrade my Symantec Backup Exec environment from 2010 R3 to 2012 SP4
Friday, March 7, 2014
How to Extend a vSphere Windows VM Disk Volume

Figure 1: Virtual machine disk out of space (13MB free of 40GB)
The only drive, and the drive out of space, was the C: drive on the VM and I really didn’t want to have to add a new virtual machine disk (although that would have been very easy to do). For a few seconds I was surprised that my VM was out of disk space and I pondered what I should do. Then, it came to me – can’t I just extend the virtual machine disk file and then expand out the Windows partition, without ever even shutting down the OS? The answer, as you’ll see at the end of this article, is YES. But how?
vSphere VM Resource Expansion Overview
vSphere really gives us a ton of flexibility when it comes to the ability to dynamically modify the CPU, memory, disk, and network resources of a VM, without ever having to shut down that VM. The real limitation is whether the OS, running inside the VM, will support adding or (even worse) removing resources – without having to power off the OS.
Before I jump into extending a virtual disk (and solving my space issue, that you see above), here is some information on adding CPU and memory to a running VM… I did some research on this and created a video (here at this post, Using vSphere Hot-Add to Dynamically Add CPU and RAM) I preparation for one of my vSphere training courses. While researching, I also found Jason Boche’s article, vSphere Memory Hot Add / CPU Hot Plug, to be helpful.
What I found was that there’s no version of Window Server, today, that will allow you to remove the CPU or RAM from a running VM. There are very few versions of Windows Server that allow you to BOTH hot add memory and hot plug a vCPU. Those are Windows Server 2008 64-bit Standard, Enterprise, and Datacenter (and standard and enterprise require the OS to be restarted for CPU hot plug).
When it comes to expanding a VM’s virtual disk, vSphere allows you to expand it as long as 1) you have a SCSI virtual disk (not IDE) and 2) as long as you don’t have any snapshots for the VM. Now, whether or not your version of Windows will automatically recognize the new size of the virtual disk is a different question. However, I can tell you that the latest version of Windows Server 2008 R2 and Windows 7 640bit WILL support this (as that is what I used below).
Extending a vSphere VM Virtual Disk
With my virtual desktop totally out of disk space and me unable to use it, I am dead in the water until I can resolve it. Fortunately, the with the version of Windows I am running and with the features of vSphere, extending the virtual disk won’t be hard…
To got started, open the vSphere Client and click on the VM that you want to extend. Click to Edit Properties on the VM to be extended. On the Hardware tab and then on the virtual disk you want to extend (such as “Hard Disk” 1 (shown in figure 2).

Figure 2
On the right side of the window, you’ll see the current size and, assuming you have met the requirements, you’ll be able to resize this up to the maximum size that the datastore has available. You can make this change with the virtual machine up and running, causing no harm to the OS or the running applications. In fact, the OS doesn’t immediately recognize the larger (virtual) disk until you tell it about it (which we are about to do, below).
Using the Extended vSphere VM Virtual Disk in the Windows OS
With the virtual disk expanded now you need to tell Windows about it and make use of it. To do this, first go into Computer Management, under Start -> Administrative Tools. Here, under Storage, click on Disk Management.

Figure 3
Assuming you just have 1 disk, click on that disk (likely “Disk 0”) and you should see that there is now “unallocated” disk space.
Right-click on the allocated piece of the disk and click Extend Volume, as you see in Figure 4.

Figure 4
This will bring up the “Extend Volume Wizard”, shown in Figure 5.

Figure 5
You’ll use the Extend Volume Wizard to first select the disk that you want to extend (on the left) and then clicking Add to move it to the right (the selected side). Click Next.

Figure 6
Likely it should only take a few seconds and you’ll see that the disk has been extended to the full size of the vSphere virtual machine disk, shown in Figure 7.

Figure 7
Now if you go to My Computer, you should also see there that the C:\ disk (the root drive) has now been extended to the maximum size of the virtual disk. Keep in mind that this disk may still be a thinly provisioned disk (as it was in the example above) and may not be filling up the full amount of space in the VMware VMFS file system as is shown in the Windows OS.

Figure 8
Thursday, January 30, 2014
Where is the IIS log files located?
Where are my IIS log files stored?
To determine where your IIS log files are stored, please perform the following steps on your server:
To determine where your IIS log files are stored, please perform the following steps on your server:
- Go to Start, click on Control Panel, then Administrative Tools
- Run Internet Information Services (IIS).
- Find your Web site under the tree on the left.
- Right-click on it and choose Properties.
- On the Web site tab, you will see an option near the bottom that says "Active Log Format." Click on the Properties button.
- At the bottom of the General Properties tab, you will see a box that contains the log file directory and the log file name. The full log path is comprised of the log file directory plus the first part of the log file name.
- Log file directory: C:\Windows\System32\LogFiles
- Log file name: W3SVC1\exyymmdd.log
Friday, January 24, 2014
SCCM 2012 SP1: How to capture Windows XP SP3 Image
Windows XP Sysprep ready for SCCM OSD Capture Guide

You need to ensure that all your hard drive controllers are set to Standard, as you can see from above, mine is currently not so will need changing.
If yours needs changing too, follow the below process, if not, you can ignore the following part;
Double click the controller you need to change then click the "Driver" tab:


This will then install and complete as below:

Ensure that you do this for all your IDE controllers and it should look similar to below:

Before rebooting the capture machine, you also need to follow the same process to change your "Computer" driver. As below, my default "Computer" driver is "ACPI Uniprocessor PC"

But it should be "Advanced Configuration and Power Interface (ACPI) PC", so follow the above steps to change this so it then should look like the below:

You should then reboot the machine to enable all these settings.
Once rebooted, the machine should then be ready to run the Configuration Manager capture media and the captured image will then run on any hardware.
How can I capture an image using capture media in ConfigMgr 2012
You may want to capture an image of a manually installed computer and Configuration Manager 2012 provides a method of doing just that called Capture Media. This media is created as an ISO file which you burn directly to cd/DVD or mount in a virtual machine and use. But first you need to make sure that the image you want to capture is in the right state, listed below
In order for the image to be captured the computer must be a member of a Workgroup, In other words, the machine you want to capture the image from must not be joined to a domain, if it is then remove it from the domain (join a workgroup).
Step 1. Join a Workgroup
Perform the following on the computer which you want to capture an image of as a local administrator.
Click on Start, Right click on Computer, choose properties, click on change settings to the right of the Computername

click on Change

type in the name of a workgroup to join and click ok

click ok to accept the computer name domain change

you'll be welcomed to the windows-noob workgroup, click ok

and you'll be told to restart, so restart..click ok to restart

Step 2. Create the Capture Media
Perform the following on the Configuration Manager server as a SMSadmin.
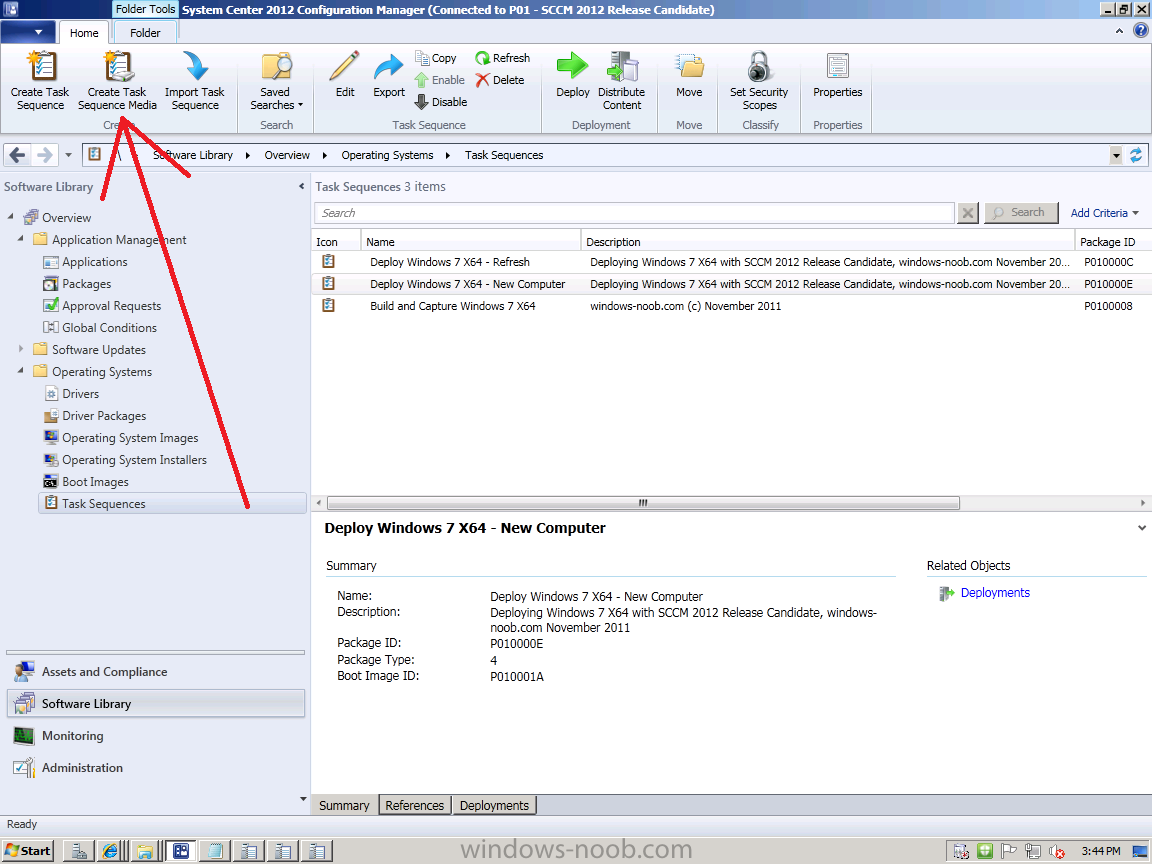
Open the ConfigMgr console, click on Software Library, Operating Systems, expand Task Sequences. In the ribbon click on Create Task Sequence Media
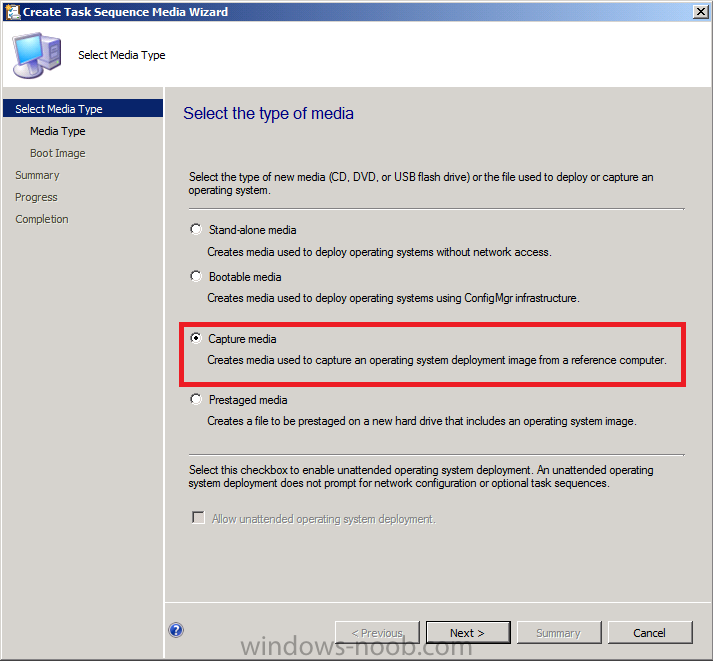
when the Create Task Sequence Media wizard appears click on Capture Media
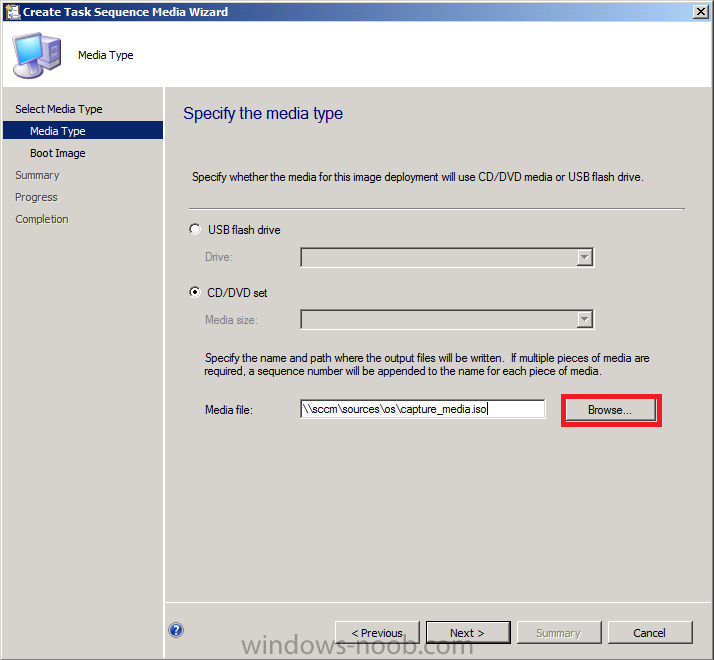
click next and browse to the path of where you want to store the ISO file, give it a name like capture_media.iso
click next, then click on browse beside boot image
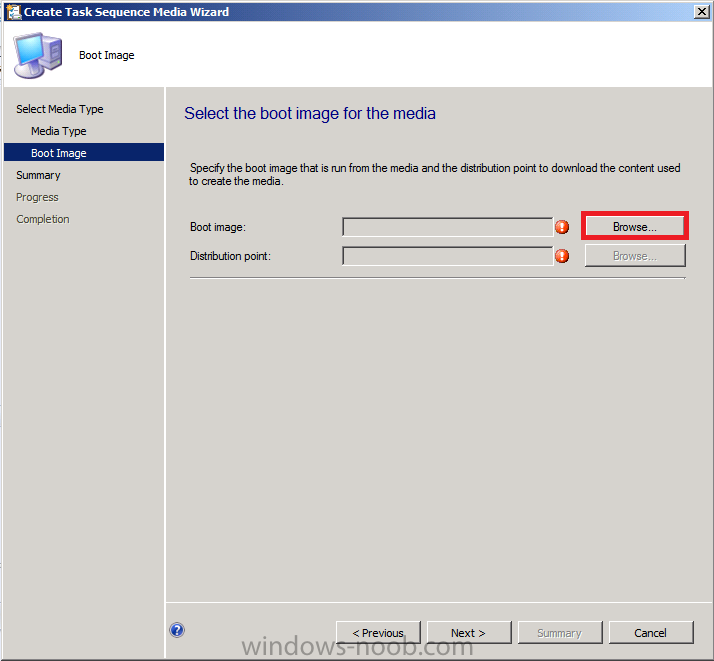
select your X86 boot image
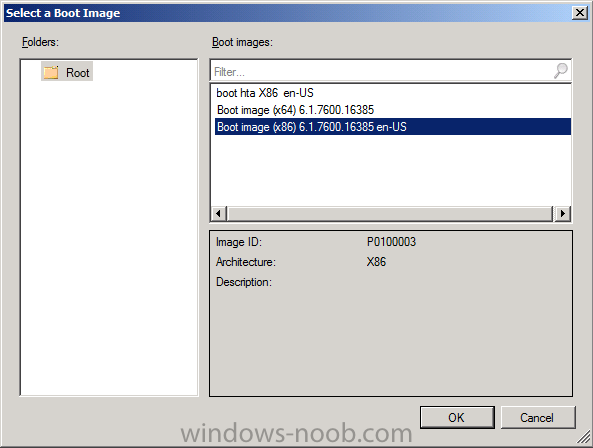
click ok, then click on Browse beside Distribution Point
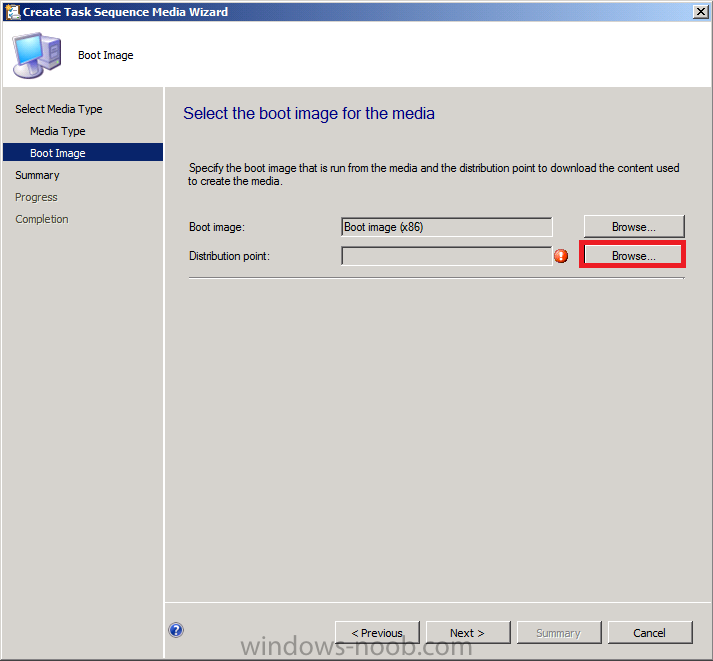
select your distribution point
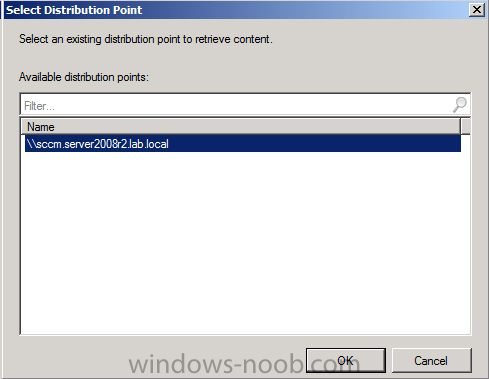
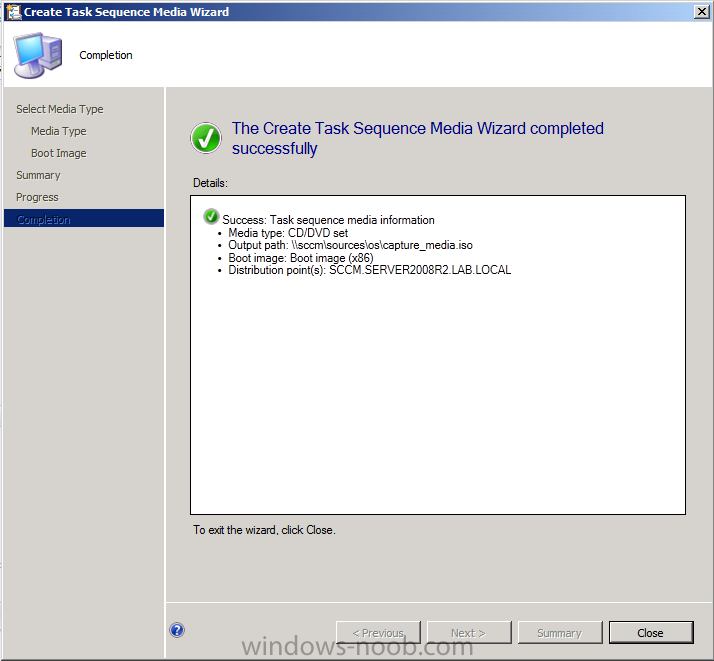
now your selected boot image and distribution point are listed, click next to continue through the wizard

if you get a UAC prompt accept it
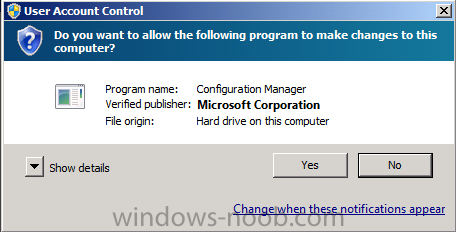
finally the media is done !
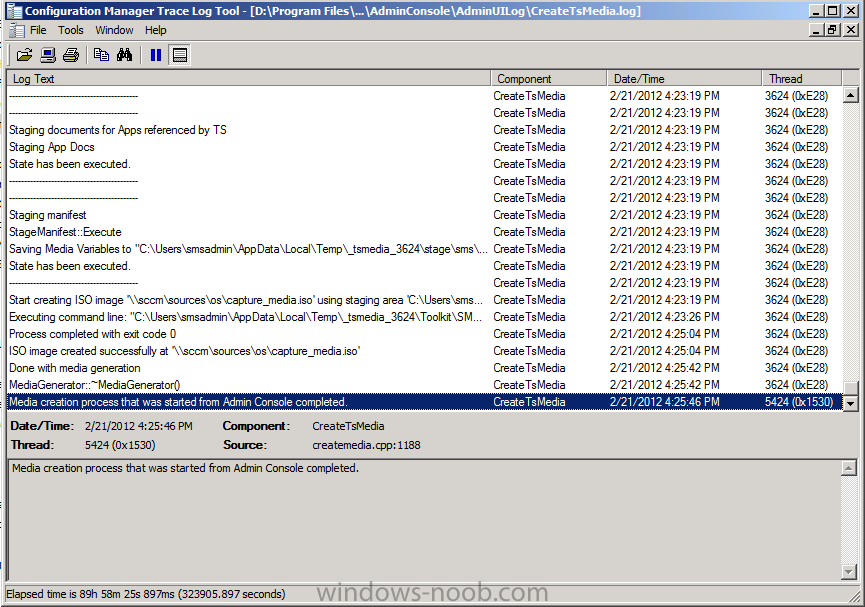
if you need to troubleshoot it's creation look at the CreateTSMedia.log file in your confmgr LOGS dir. (D:\Program Files\Microsoft Configuration Manager\AdminConsole\AdminUILog)
Step 3. While in Windows, start the ISO/CD/DVD on the Workgroup Computer
Perform the following on the computer which you want to capture an image of as a local administrator.
if you are using virtual hardware (hyperv or vmware) just mount the ISO on your workgroup computer (click on Media, Insert Disc, browse to the ISO location), otherwise burn the ISO to cd/dvd and insert that burned cd/dvd into the computer you need to capture.
While still in Windows (do not try to boot from this ISO/CD/DVD) you should see the following
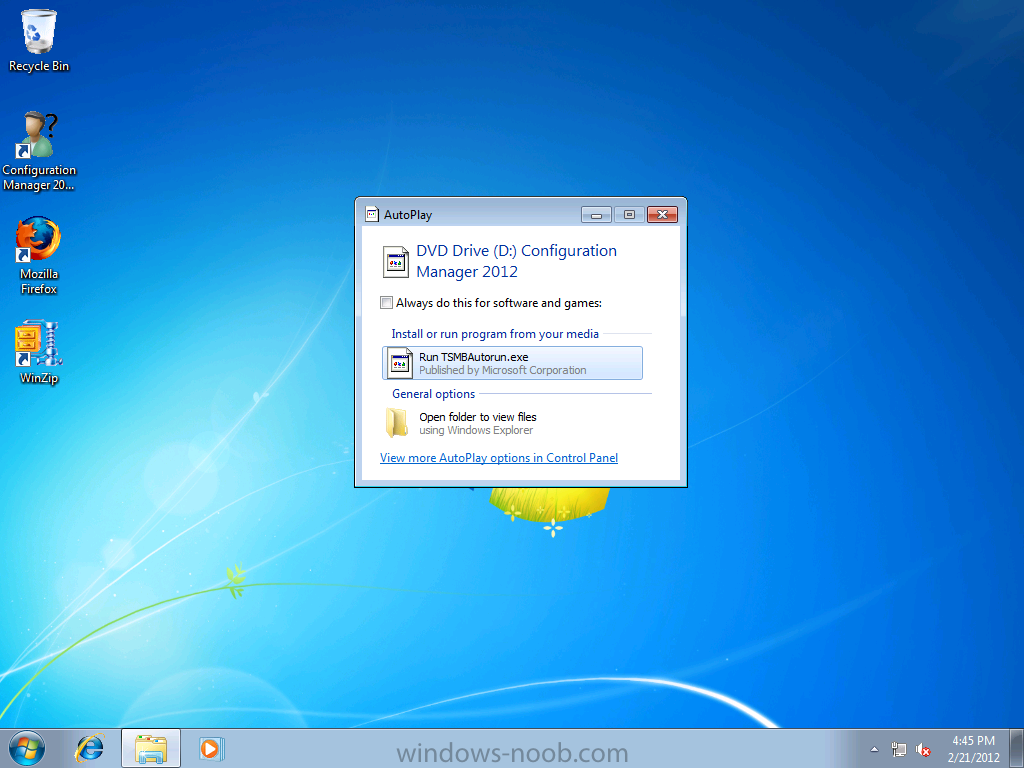
click on Run TSMBAutorun.exe
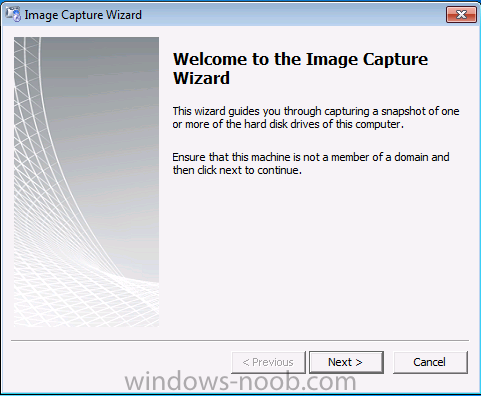
Welcome to the Image Capture Wizard appears, click next..
Enter a path and name for the WIM file, I chose \\sccm\sources\os\captures\captured.wim and then enter the credentials of a user with permissions to write to that location
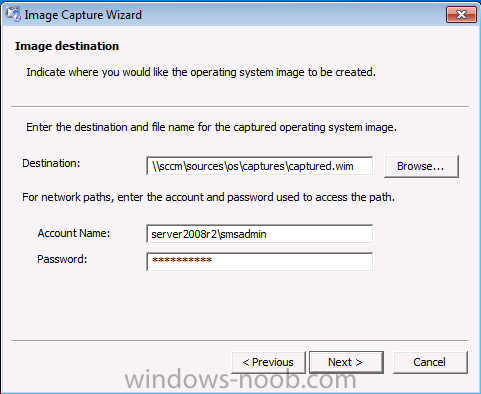
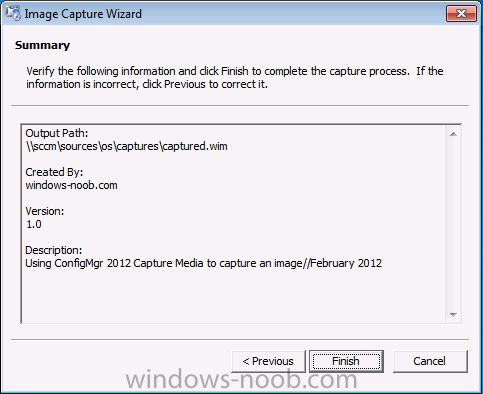
enter some Image Information

review the summary
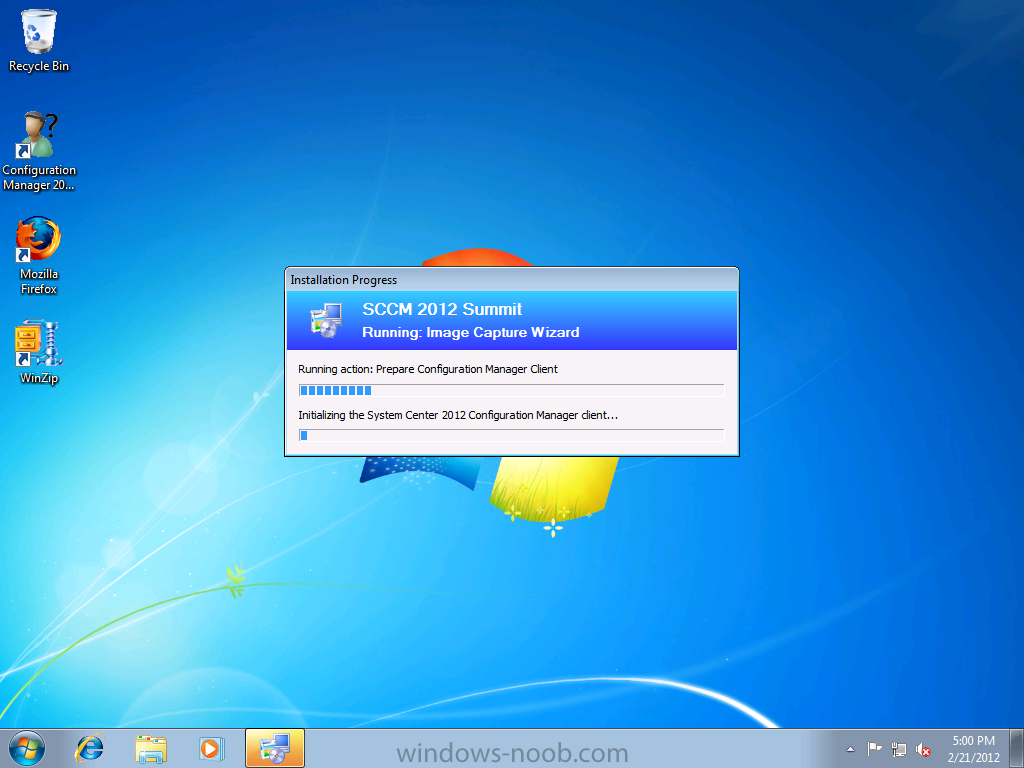
and click finish to start the capture process, notice how it prepares the config manager client
and then it syspreps
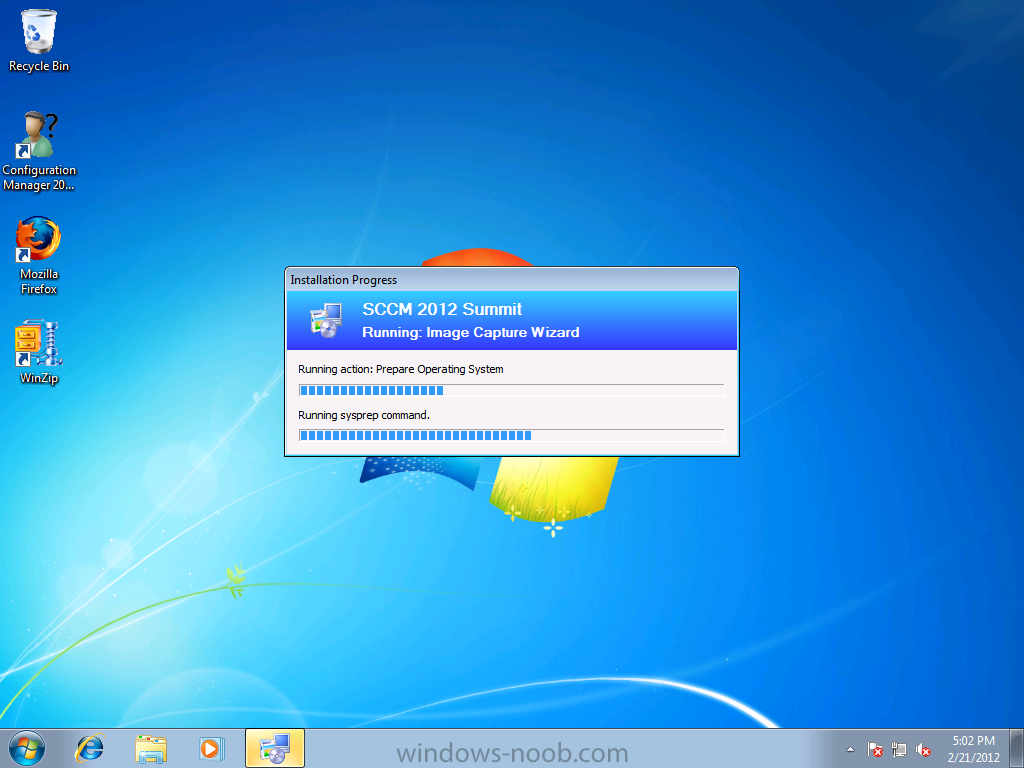
before rebooting into Windows PE to capture the system
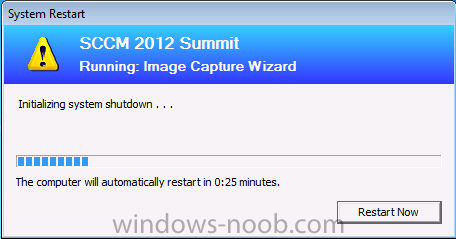
and the capture begins !
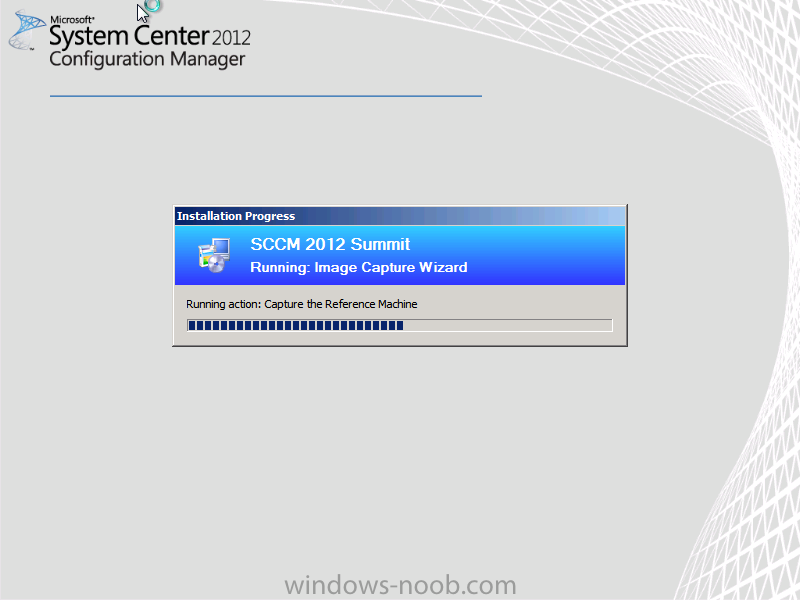
success !
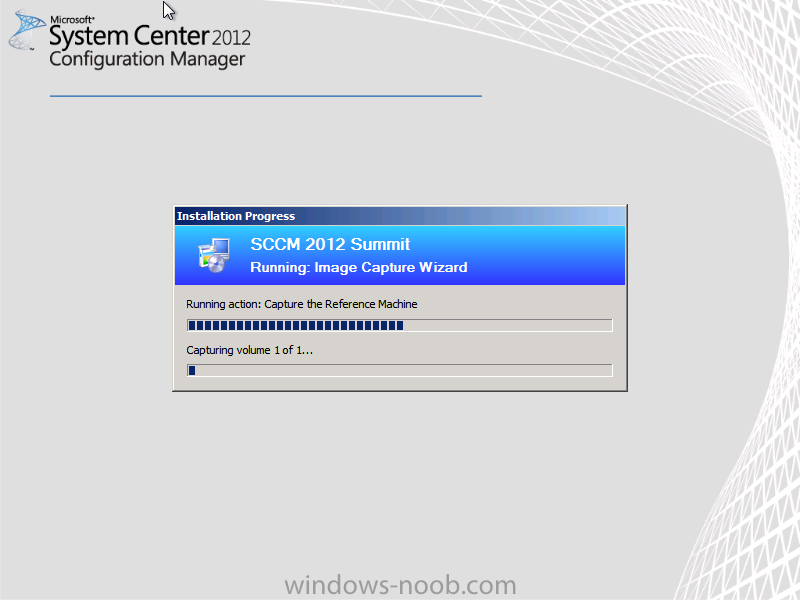
all done, the image is captured.

Troubleshooting Tips:
If you see an error in SMSTS.log (probably in C:\Windows\CCM\Logs or C:\Windows\SysWow64\CCM\logs) which sates Waiting for CCMExec service to be fully available, locate the SMS Agent Host service in services.msc and start the service.
CREDITS: Techy Geeks Home & Windows-noob.com
This guide will show you what you need to do to capture a Windows XP Service Pack 3 image, which you can then capture and deploy using Configuration Manager.
First of all, you need to create a full image that is ready to be captured. This is usually best to install on a virtual machine using VMWare or Hyper-V, however, you can if you want, use a physical machine.
Once you have fully completed your image and have all programs and settings on it that you want, you can start the Sysprep and capture configuration process.
You will need the sysprep files, extra driver files and also the custom sysprep file to complete this process successfully. I have already created these for you and they are available to download from below - note that this is for XP Service Pack 3 - if you are using a different service pack for some reason, either upgrade or get the version of Sysprep for that Service Pack:
Download Sysprep Pack
Once you have downloaded this pack, you can extract the zip files and copy the "DRIVERS" and "SYSPREP" folders to the root of your capture machines C:\ drive.
You should then edit the C:\SYSPREP\sysprep.ini file with your own custom settings, like Company Name, AdminPassword and ProductKey.
THIS IS A CRITICAL PART OF THE PROCESS!!!
If you do not complete this part, if will not work correctly and will limit the image to the hardware that you have built the capture machine on.
Go into Computer Management and then into the Device Manager.
Then Expand the IDE ATA/ATAPI Controllers like below:

You need to ensure that all your hard drive controllers are set to Standard, as you can see from above, mine is currently not so will need changing.
If yours needs changing too, follow the below process, if not, you can ignore the following part;
Double click the controller you need to change then click the "Driver" tab:

Click the Update Driver button, then, when the dialog box appears choose "No not at this time" and click next:

Then click "Install from a list or specify location (Advanced)" and then click next:

Then click "Don't search, I will choose the driver to install":

You should then have the option to select the "Standard" driver that you require, highlight this and click next:

This will then install and complete as below:

Ensure that you do this for all your IDE controllers and it should look similar to below:
Before rebooting the capture machine, you also need to follow the same process to change your "Computer" driver. As below, my default "Computer" driver is "ACPI Uniprocessor PC"
But it should be "Advanced Configuration and Power Interface (ACPI) PC", so follow the above steps to change this so it then should look like the below:
You should then reboot the machine to enable all these settings.
Once rebooted, the machine should then be ready to run the Configuration Manager capture media and the captured image will then run on any hardware.
How can I capture an image using capture media in ConfigMgr 2012
You may want to capture an image of a manually installed computer and Configuration Manager 2012 provides a method of doing just that called Capture Media. This media is created as an ISO file which you burn directly to cd/DVD or mount in a virtual machine and use. But first you need to make sure that the image you want to capture is in the right state, listed below
- workgroup joined
In order for the image to be captured the computer must be a member of a Workgroup, In other words, the machine you want to capture the image from must not be joined to a domain, if it is then remove it from the domain (join a workgroup).
Step 1. Join a Workgroup
Perform the following on the computer which you want to capture an image of as a local administrator.
Click on Start, Right click on Computer, choose properties, click on change settings to the right of the Computername
click on Change
type in the name of a workgroup to join and click ok
click ok to accept the computer name domain change
you'll be welcomed to the windows-noob workgroup, click ok
and you'll be told to restart, so restart..click ok to restart
Step 2. Create the Capture Media
Perform the following on the Configuration Manager server as a SMSadmin.
Open the ConfigMgr console, click on Software Library, Operating Systems, expand Task Sequences. In the ribbon click on Create Task Sequence Media
when the Create Task Sequence Media wizard appears click on Capture Media
click next and browse to the path of where you want to store the ISO file, give it a name like capture_media.iso
click next, then click on browse beside boot image
select your X86 boot image
click ok, then click on Browse beside Distribution Point
select your distribution point
now your selected boot image and distribution point are listed, click next to continue through the wizard
if you get a UAC prompt accept it
finally the media is done !
if you need to troubleshoot it's creation look at the CreateTSMedia.log file in your confmgr LOGS dir. (D:\Program Files\Microsoft Configuration Manager\AdminConsole\AdminUILog)
Step 3. While in Windows, start the ISO/CD/DVD on the Workgroup Computer
Perform the following on the computer which you want to capture an image of as a local administrator.
if you are using virtual hardware (hyperv or vmware) just mount the ISO on your workgroup computer (click on Media, Insert Disc, browse to the ISO location), otherwise burn the ISO to cd/dvd and insert that burned cd/dvd into the computer you need to capture.
While still in Windows (do not try to boot from this ISO/CD/DVD) you should see the following
click on Run TSMBAutorun.exe
Welcome to the Image Capture Wizard appears, click next..
Enter a path and name for the WIM file, I chose \\sccm\sources\os\captures\captured.wim and then enter the credentials of a user with permissions to write to that location
enter some Image Information
review the summary
and click finish to start the capture process, notice how it prepares the config manager client
and then it syspreps
before rebooting into Windows PE to capture the system
and the capture begins !
success !
all done, the image is captured.
Troubleshooting Tips:
If you see an error in SMSTS.log (probably in C:\Windows\CCM\Logs or C:\Windows\SysWow64\CCM\logs) which sates Waiting for CCMExec service to be fully available, locate the SMS Agent Host service in services.msc and start the service.
Quote
The capture media seems to work fine on Windows 7 installations where Autoplay is enabled and the media can launch TSMBAutorun.exe automatically. However, if you have to launch TSMBAutorun.exe by navigating to the SMS\bin\i386 folder (for instance if autoplay isn't working or you extract create/extract to a USB key), then the wizard does not launch. This seems to be because when you use explorer to run TSMBAutorun.exe the current working directory becomes SMS/bin/i386 and TSMBAutorun.exe expects to find TSMBootstrap.exe in <currentworkingdir>\sms\bin\x64 (or x86) - which would resolve, as John as found, to an invalid path of D:\SMS\BIN\i386\SMS\BIN\x64\TSMBootstrap.exe.
On newly built systems using MDT2012, I think the Apply GPO Pack step applies a default Windows 7 SP1 local policy that disables autorun - therefore we encounter the issue trying to use the capture media. Simply running gpedit.msc and cancelling the 'Turn off Autoplay' option in 'Computer Configuration/Administrative Templates/Windows Components/AutoPlay Policies' allows the Capture media wizard to run via autoplay.
If you do leave Autoplay turned off, you can workaround the issue simply by opening a command prompt at the root of the capture media drive and running sms\bin\i386 smbautorun.exe.
CREDITS: Techy Geeks Home & Windows-noob.com
Subscribe to:
Posts (Atom)