So today I realized my SCCM 2012 reporting point server C drive is extremely low (Got an alert from Network Performance Monitor that I setup to monitor servers status). I then ran the freeware Treesize to view what is taking up so much disk space on my C drive, turns out to be my SQL Database.
Solution:
1. installed microsoft sql server management studio on the SCCM 2012 reporting point server..
2. login with administrator access user to shrinking the transaction log
3.. in object explorer, connect to an instance of the sql server database engine and then expand that instance.
2. expand databases and then right-click the database that you want to shrink.
3. point to tasks, point to shrink, and then click files.
4. select the file type and file name.
5. optionally, select the release unused space check box.
selecting this option causes any unused space in the file to be released to the operating system and shrinks the file to the last allocated extent. this reduces the file size without moving any data.
6.click ok.
Thursday, July 18, 2013
Wednesday, July 10, 2013
Installing VMware ESXi 4.1 Update 1 in VMware Workstation 7.1.4
Installing VMware ESXi 4.1 Update 1 in VMware Workstation 7.1.4
Open Workstation and go to File --> New --> Virtual Machine the next screen will show:

Choose Custom and click next. The following screen will show:
 Make sure Workstation 6.5-7.x is selected and click Next. The following screen will show:
 Choose "Installer disc image file (iso):" and browse to the downloaded ISO file and select it. Click Next and the following screen will show:

Make sure VMware ESX --> ESX Server 4 and click Next. The following screen will show:
 Provide a name and location for the Virtual Machine and click Next. The following screen will show:


Choose the network connection you want to use and click Next. The following screen will show:


Select a Disk (Create a new virtual disk) and click Next. The following screen will show:

Select the Virtual disk type (SCSI) and click Next. The following screen will show:

Specify Disk Capacity and Click Next. The following screen will show:

Specify the Disk File and click Next. The following screen will show:

Check the Virtual Machine settings and click Finish. The following screen will show:

Click with the mouse in the VM Screen an press Enter. The following screen will show:

Press Enter to Install. The following screen will show:
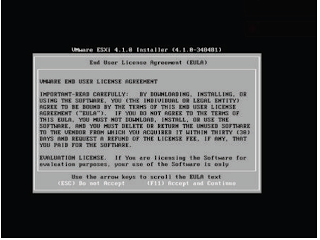
Press F11 to Accept and Continue. The following screen will show:
 Press Enter to Continue. The following screen will show:

Press F11 to Install. The following screen will show:

After Install The following screen will show:

Press Enter to Reboot. After Reboot the following screen will show:
 Press F2 to customize the system. The following screen will show:

The default Root password is blank, so just press enter. The following screen will show:
 Press Enter to configure a new Root Password. The following screen will show:
 Put the new Password in twice, and press enter. The following screen will show:
 Select Configure Management Network and press Enter. The following screen will show:

Go to IP Configuration and press Enter. The following screen will show:
 Input the right IP Address, Subnet Mask and Default Gateway and press Enter. Select DNS config and press Enter the following screen will show:

Network settings. The following screen will show:
 Press Y (Yes) to confirm. The following screen will show:

 Open a web browser and surf to the provided site http://entered-ip-address(DNS
). The followingscreen will show:
Press Continue to this website (not recommended). The following screen will show:
 Click Download the vSphere Client and install the client. After install the following screen will show:

Put in the settings just set for the ESXi server and Login. The following screen will show:
 Check the Install this certificate... box and press Ignore. The following screen will show:

Congratulations your done installing ESXi 4.1.
Installing VMware ESXi 4.1 U1 in VMware Workstation
We'll install VMware ESXi in WMware workstation.
Make sure you've downloaded the ESXi ISO file.
If you're done downloading lets jump right into installing:
Open Workstation and go to File --> New --> Virtual Machine the next screen will show:

Choose Custom and click next. The following screen will show:


Make sure VMware ESX --> ESX Server 4 and click Next. The following screen will show:


Select the right processor configuration and click Next (Most of the time default is OK). The following
screen will show: 
Select the amount of memory available for the Virtual Machine and click Next. The following screen will show:


Select the I/O controller you want to use (in most cases the recommended) and click Next. The
following screen will show:
following screen will show:


Select the Virtual disk type (SCSI) and click Next. The following screen will show:

Specify Disk Capacity and Click Next. The following screen will show:

Specify the Disk File and click Next. The following screen will show:

Check the Virtual Machine settings and click Finish. The following screen will show:

Click with the mouse in the VM Screen an press Enter. The following screen will show:

Press Enter to Install. The following screen will show:


Press F11 to Install. The following screen will show:

After Install The following screen will show:

Press Enter to Reboot. After Reboot the following screen will show:


The default Root password is blank, so just press enter. The following screen will show:


Go to IP Configuration and press Enter. The following screen will show:


Put in the right DNS Settings and press enter and then Esc. to exit the Configure Management
Network settings. The following screen will show:


). The followingscreen will show:
Press Continue to this website (not recommended). The following screen will show:


Put in the settings just set for the ESXi server and Login. The following screen will show:


Congratulations your done installing ESXi 4.1.
Subscribe to:
Posts (Atom)