This guide will show you what you need to do to capture a Windows XP Service Pack 3 image, which you can then capture and deploy using Configuration Manager.
First of all, you need to create a full image that is ready to be captured. This is usually best to install on a virtual machine using VMWare or Hyper-V, however, you can if you want, use a physical machine.
Once you have fully completed your image and have all programs and settings on it that you want, you can start the Sysprep and capture configuration process.
You will need the sysprep files, extra driver files and also the custom sysprep file to complete this process successfully. I have already created these for you and they are available to download from below - note that this is for XP Service Pack 3 - if you are using a different service pack for some reason, either upgrade or get the version of Sysprep for that Service Pack:
Download Sysprep Pack
Once you have downloaded this pack, you can extract the zip files and copy the "DRIVERS" and "SYSPREP" folders to the root of your capture machines C:\ drive.
You should then edit the C:\SYSPREP\sysprep.ini file with your own custom settings, like Company Name, AdminPassword and ProductKey.
THIS IS A CRITICAL PART OF THE PROCESS!!!
If you do not complete this part, if will not work correctly and will limit the image to the hardware that you have built the capture machine on.
Go into Computer Management and then into the Device Manager.
Then Expand the IDE ATA/ATAPI Controllers like below:

You need to ensure that all your hard drive controllers are set to Standard, as you can see from above, mine is currently not so will need changing.
If yours needs changing too, follow the below process, if not, you can ignore the following part;
Double click the controller you need to change then click the "Driver" tab:

Click the Update Driver button, then, when the dialog box appears choose "No not at this time" and click next:

Then click "Install from a list or specify location (Advanced)" and then click next:

Then click "Don't search, I will choose the driver to install":

You should then have the option to select the "Standard" driver that you require, highlight this and click next:

This will then install and complete as below:

Ensure that you do this for all your IDE controllers and it should look similar to below:

Before rebooting the capture machine, you also need to follow the same process to change your "Computer" driver. As below, my default "Computer" driver is "ACPI Uniprocessor PC"

But it should be "Advanced Configuration and Power Interface (ACPI) PC", so follow the above steps to change this so it then should look like the below:
You should then reboot the machine to enable all these settings.
Once rebooted, the machine should then be ready to run the Configuration Manager capture media and the captured image will then run on any hardware.
How can I capture an image using capture media in ConfigMgr 2012
You may want to capture an image of a manually installed computer and Configuration Manager 2012 provides a method of doing just that called Capture Media. This media is created as an ISO file which you burn directly to cd/DVD or mount in a virtual machine and use. But first you need to make sure that the image you want to capture is in the right state, listed below
- workgroup joined
In order for the image to be captured the computer must be a member of a Workgroup, In other words, the machine you want to capture the image from must not be joined to a domain, if it is then remove it from the domain (join a workgroup).
Step 1. Join a Workgroup
Perform the following on the computer which you want to capture an image of as a local administrator.
Click on Start, Right click on Computer, choose properties, click on change settings to the right of the Computername

click on Change

type in the name of a workgroup to join and click ok

click ok to accept the computer name domain change

you'll be welcomed to the windows-noob workgroup, click ok

and you'll be told to restart, so restart..click ok to restart

Step 2. Create the Capture Media
Perform the following on the Configuration Manager server as a SMSadmin.
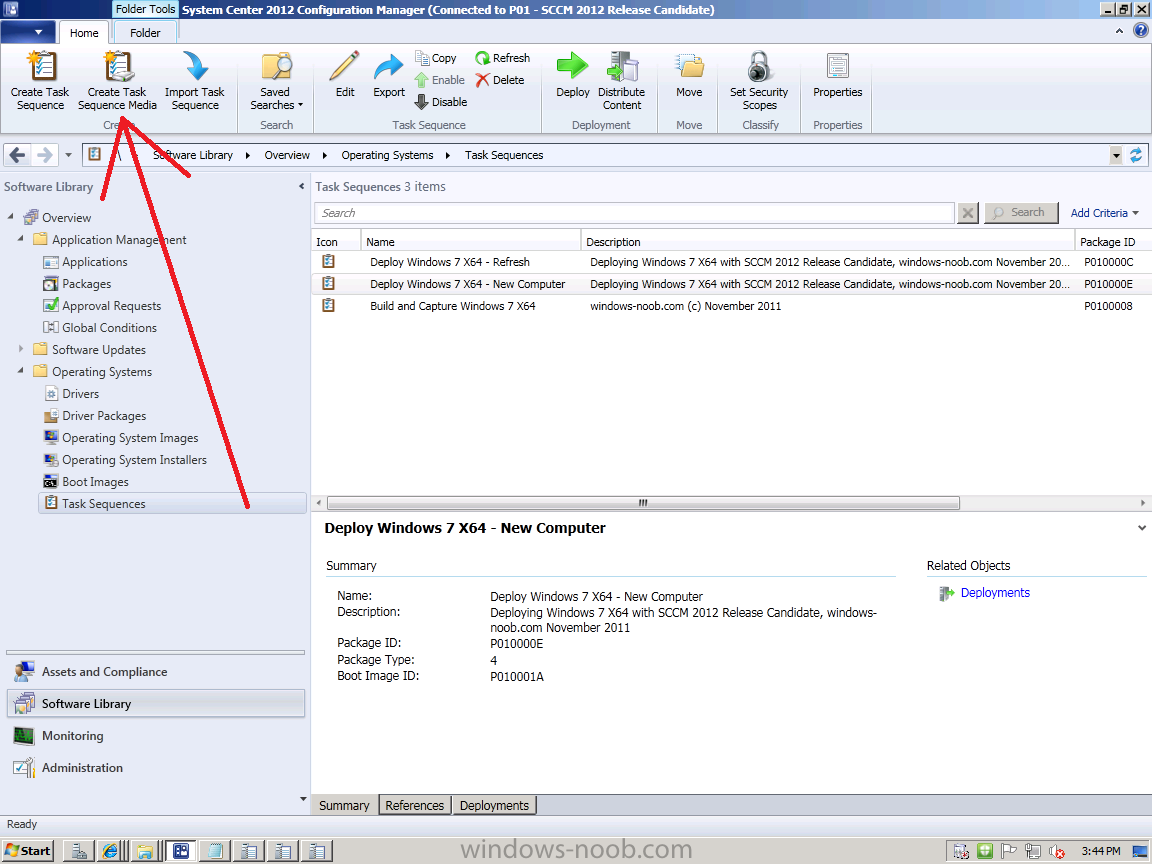
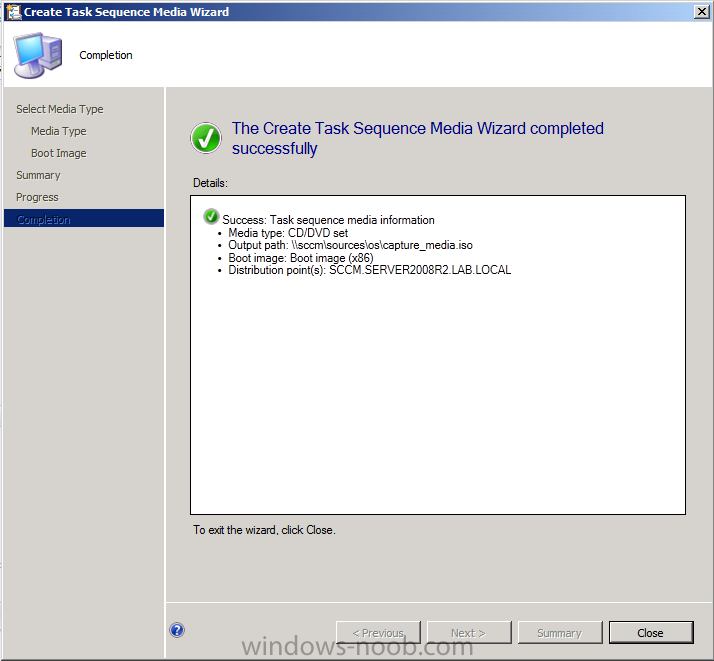
Open the ConfigMgr console, click on Software Library, Operating Systems, expand Task Sequences. In the ribbon click on Create Task Sequence Media
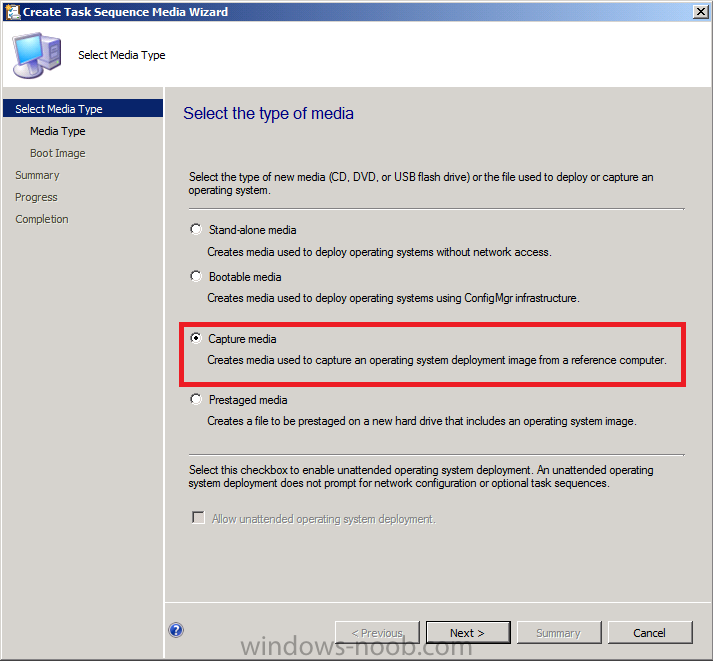
when the Create Task Sequence Media wizard appears click on Capture Media
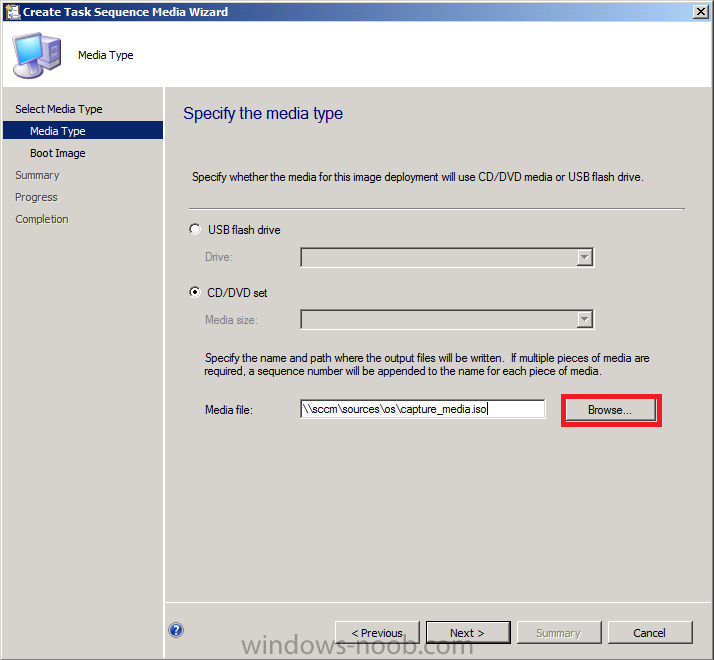
click next and browse to the path of where you want to store the ISO file, give it a name like capture_media.iso
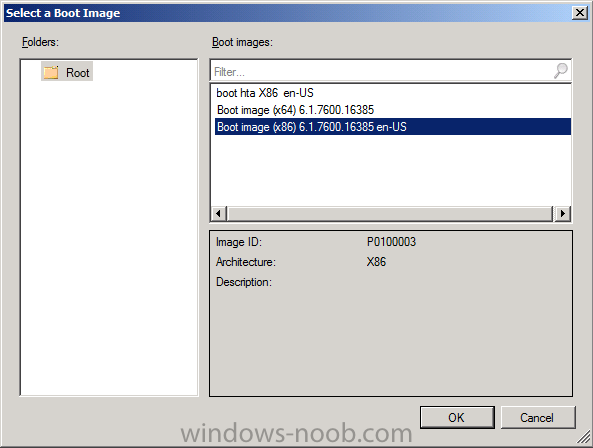
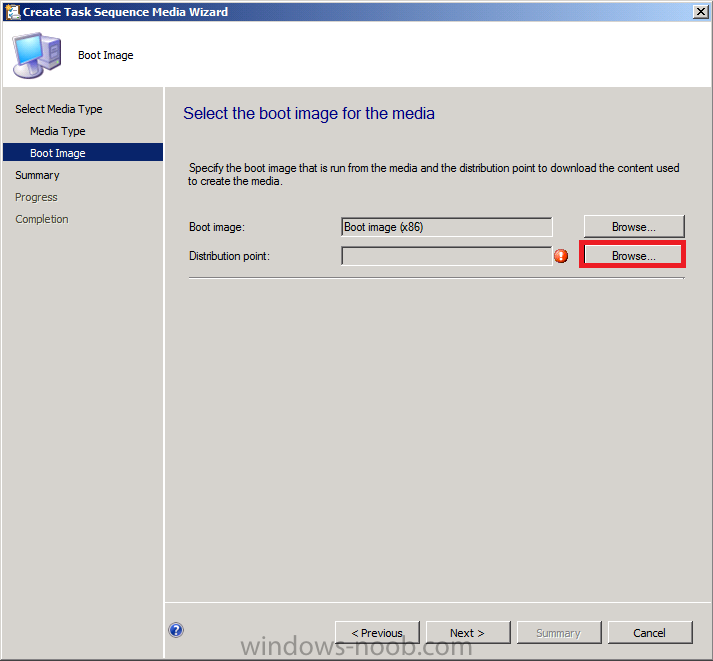
click next, then click on browse beside boot image
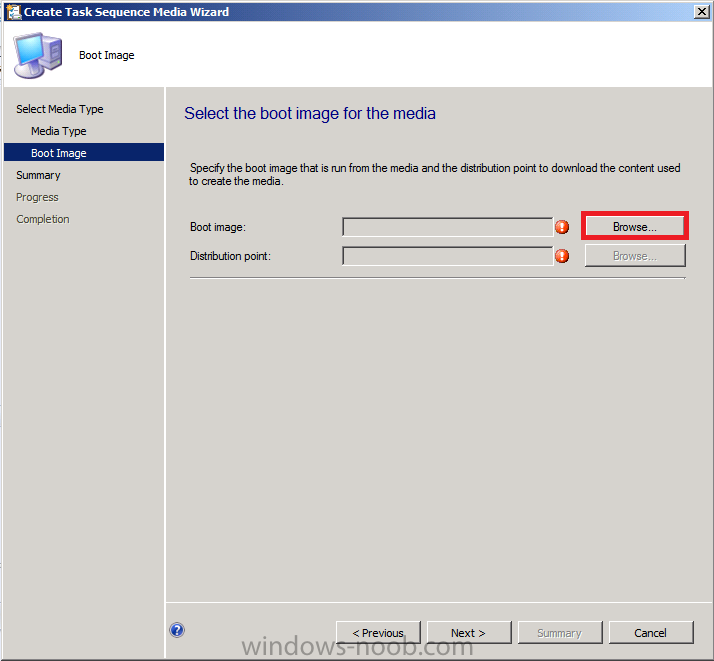
select your X86 boot image
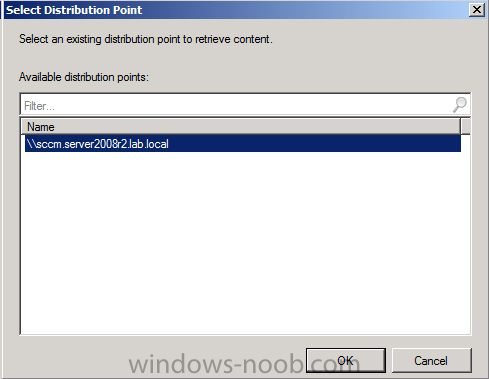
click ok, then click on Browse beside Distribution Point
select your distribution point
now your selected boot image and distribution point are listed, click next to continue through the wizard

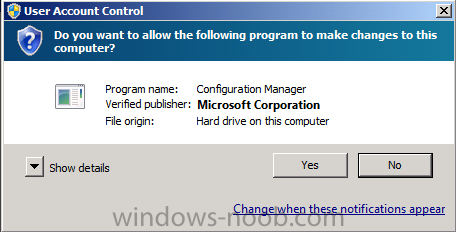
if you get a UAC prompt accept it
finally the media is done !
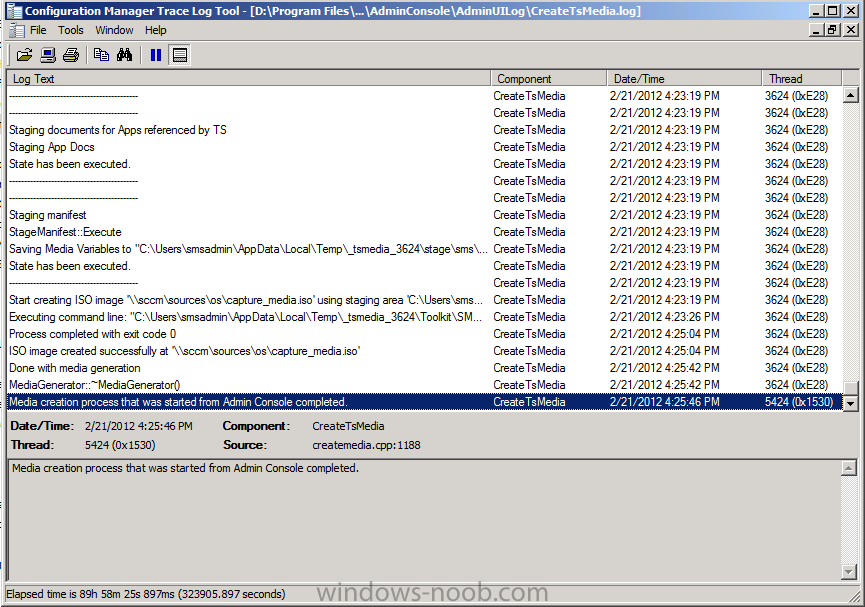
if you need to troubleshoot it's creation look at the CreateTSMedia.log file in your confmgr LOGS dir. (D:\Program Files\Microsoft Configuration Manager\AdminConsole\AdminUILog)
Step 3. While in Windows, start the ISO/CD/DVD on the Workgroup Computer
Perform the following on the computer which you want to capture an image of as a local administrator.
if you are using virtual hardware (hyperv or vmware) just mount the ISO on your workgroup computer (click on Media, Insert Disc, browse to the ISO location), otherwise burn the ISO to cd/dvd and insert that burned cd/dvd into the computer you need to capture.
While still in Windows (do not try to boot from this ISO/CD/DVD) you should see the following
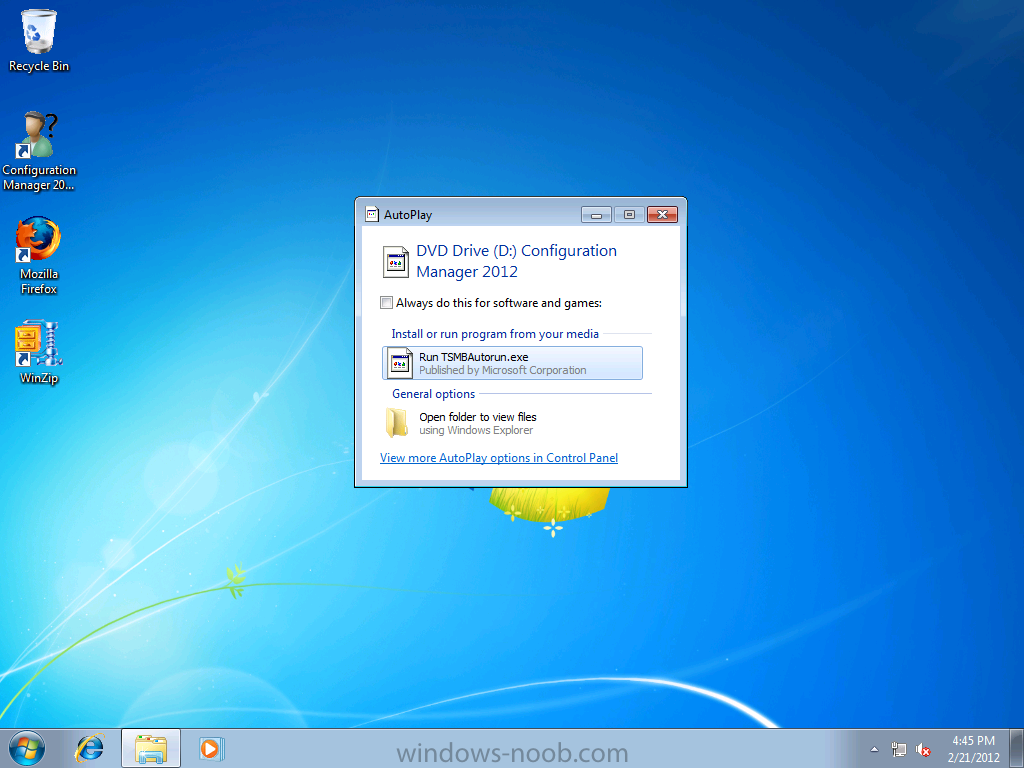
click on Run TSMBAutorun.exe
Welcome to the Image Capture Wizard appears, click next..
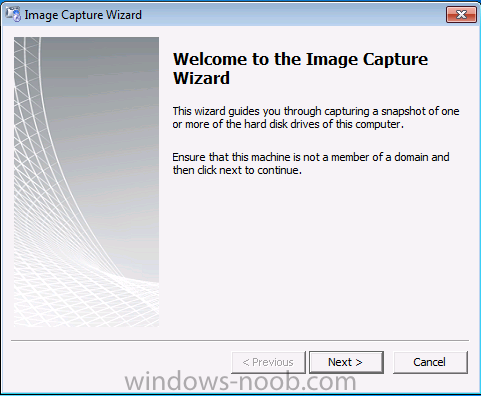
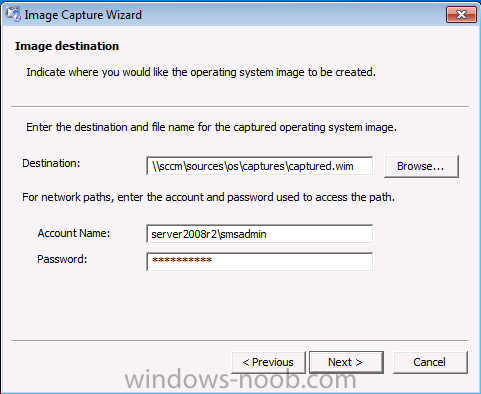
Enter a path and name for the WIM file, I chose \\sccm\sources\os\captures\captured.wim and then enter the credentials of a user with permissions to write to that location
enter some Image Information

review the summary
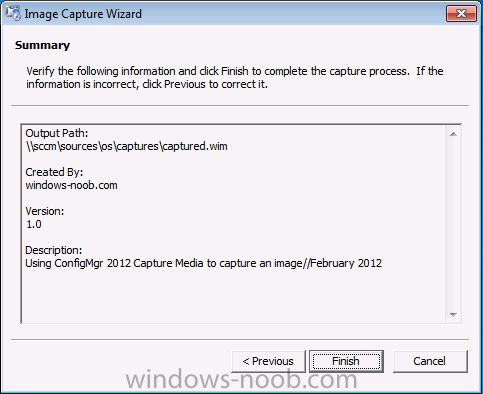
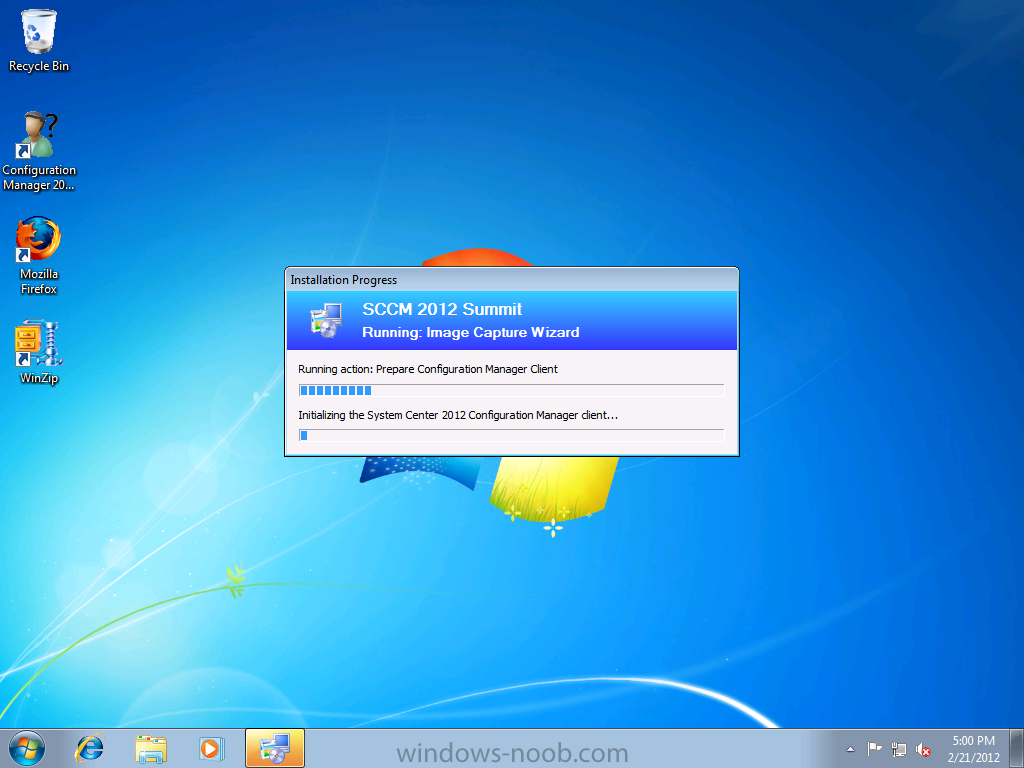
and click finish to start the capture process, notice how it prepares the config manager client
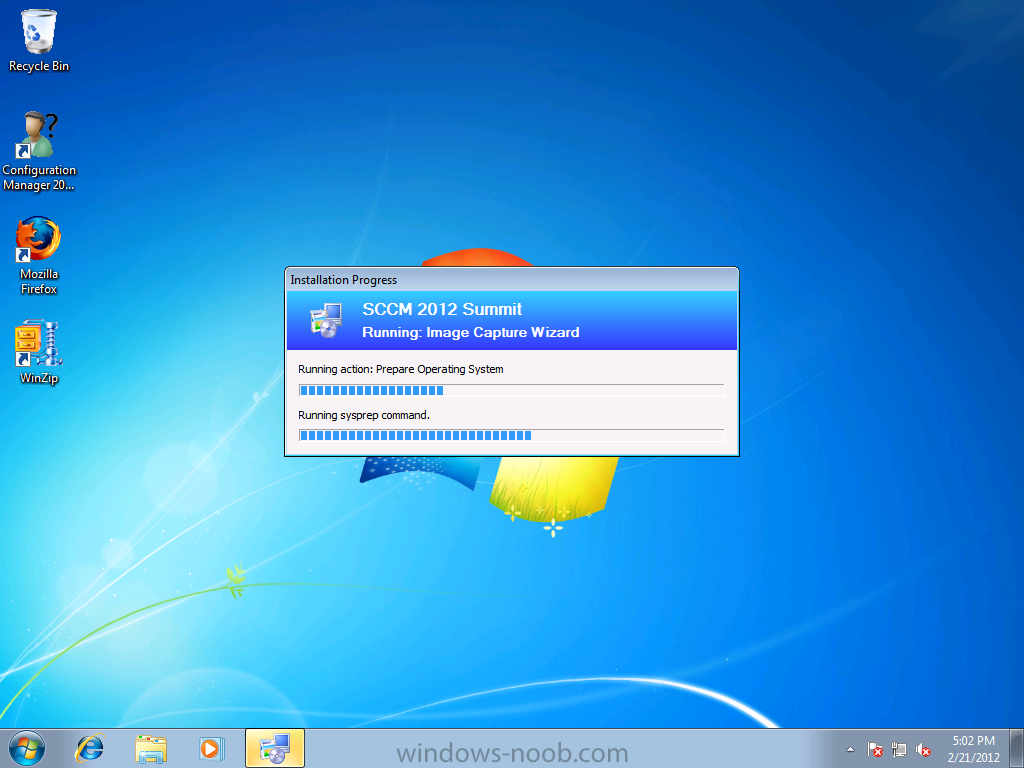
and then it syspreps
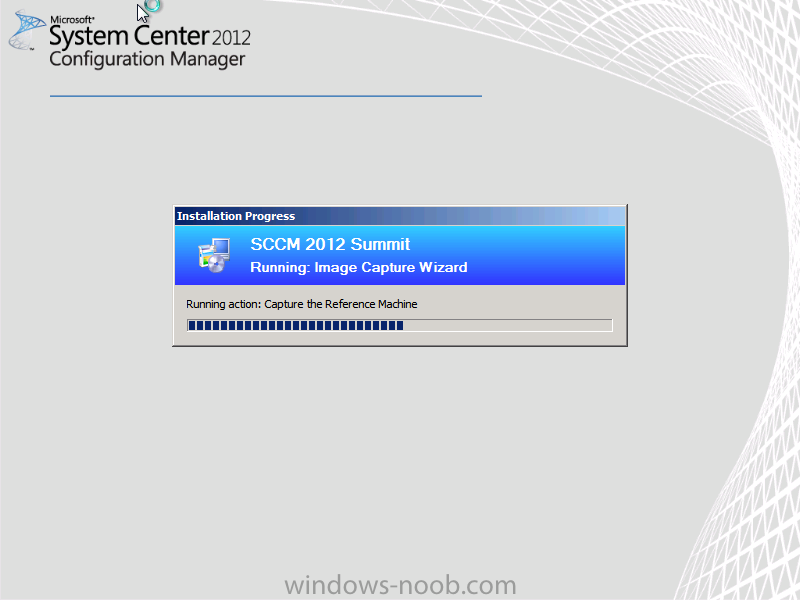
before rebooting into Windows PE to capture the system
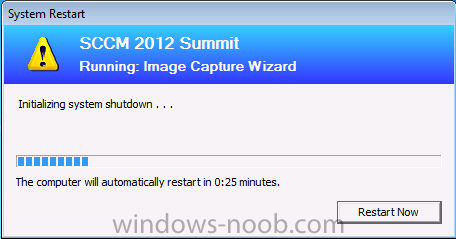
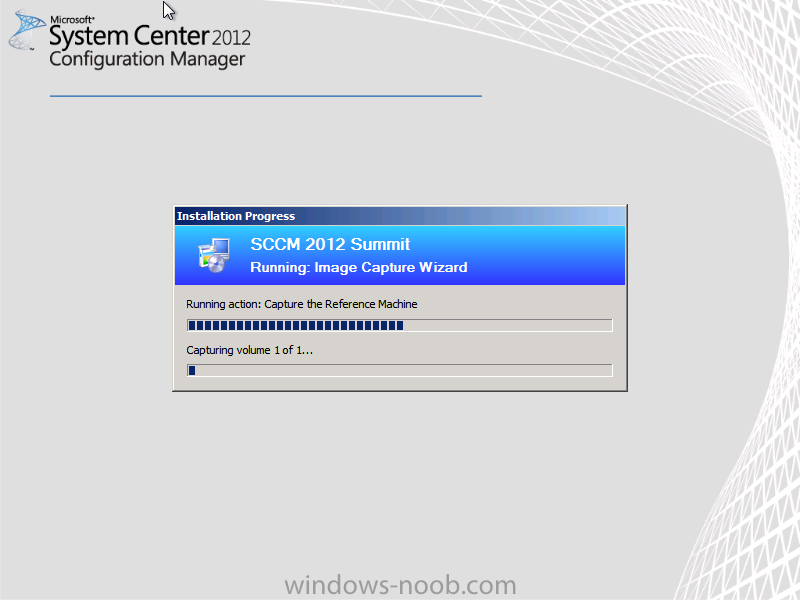
and the capture begins !
success !
all done, the image is captured.

Troubleshooting Tips:
If you see an error in SMSTS.log (probably in C:\Windows\CCM\Logs or C:\Windows\SysWow64\CCM\logs) which sates Waiting for CCMExec service to be fully available, locate the SMS Agent Host service in services.msc and start the service.
Quote
The capture media seems to work fine on Windows 7 installations where Autoplay is enabled and the media can launch TSMBAutorun.exe automatically. However, if you have to launch TSMBAutorun.exe by navigating to the SMS\bin\i386 folder (for instance if autoplay isn't working or you extract create/extract to a USB key), then the wizard does not launch. This seems to be because when you use explorer to run TSMBAutorun.exe the current working directory becomes SMS/bin/i386 and TSMBAutorun.exe expects to find TSMBootstrap.exe in <currentworkingdir>\sms\bin\x64 (or x86) - which would resolve, as John as found, to an invalid path of D:\SMS\BIN\i386\SMS\BIN\x64\TSMBootstrap.exe.
On newly built systems using MDT2012, I think the Apply GPO Pack step applies a default Windows 7 SP1 local policy that disables autorun - therefore we encounter the issue trying to use the capture media. Simply running gpedit.msc and cancelling the 'Turn off Autoplay' option in 'Computer Configuration/Administrative Templates/Windows Components/AutoPlay Policies' allows the Capture media wizard to run via autoplay.
If you do leave Autoplay turned off, you can workaround the issue simply by opening a command prompt at the root of the capture media drive and running sms\bin\i386 smbautorun.exe.
CREDITS: Techy Geeks Home & Windows-noob.com
Thanks for the credit at the bottom of your site, but a link would be nice! Also, it looks like you are linking to our old file location on our SourceForge site for your Sysprep files - this has moved so you may want to either change the link or host the files yourself.
ReplyDeleteThe mashine captured here is a win7 enterprise?
ReplyDeleteHave you done a windows xp capture with sccm2012r2?